Morakniv Classic No.2 Review


Morakniv Classic No.2

 Morakniv have been making knives for over 400 years. They're very popular with lots of bushcrafters around the world for various reasons. Mora knives are high quality for the price point. They're cheap and they're built to last. They're often recommended to beginners, but that doesn't mean that more experienced bushcrafters do not use these knives, they do. All Morakniv knives are made in Sweden.

Birch handle 

The Mora classic No.2 is a traditional Swedish carpenters and woodworkers knife. It is practically a "Puukko" style knife, which is popular across all the Nordic countries. The knife is balanced perfectly with a rat tail tang, which makes it perfect for delicate work that is often required in bushcraft. The birch handle is barrel shaped and comfortable in the hand. If you have big hands, you will not be disappointed with the handle of this knife.  The steel is European C100 steel. This is a high carbon steel with the heat treat aimed towards high edge retention and strength. The blade is Scandinavian grind. These usually come with a micro bevel from the factory and are quite sharp. You can achieve a sharper edge with a little time spent on a whetstone and by removing the micro bevel, you'll achieve a extremely sharp edge.

Scandi grind with a clip point

Morakniv Classic No.2 Specs:

Overall length: 250mm

Blade length: 105mm

Blade thickness: 2.5mm

Handle material: Birch

Blade Steel: C100 Carbon steel

Plastic Polymer Sheath

Front of the sheath

The first negative with this knife is unfortunately, the sheath. Years ago, this knife was provided with a leather sheath, but is now provided with a plastic polymer one instead. The plastic is hard wearing and strong, but the belt loop part of the sheath is flimsy and feels like it would snap after some hard use. There are two drainage holes that allow ventilation in the sheath. I haven't attached this sheath to my belt due it being flimsy. Instead, I keep it in my pack until needed. This isn't ideal and I will be making a leather sheath, so that the knife can be worn on a belt.

Rear of the sheath

Overall the classic No.2 is a fantastic knife for bushcraft applications. First and foremost, this knife is not going to be suitable for heavy battening of wood; the knife is suitable for lighter bushcraft applications. The knife is perfect for fire preparation, shelter building, fishing, hunting and many other bushcraft practices. I've been using this knife for over a year now and have been impressed with the performance. The only modification I made is to the spine of the blade, this is rounded off at the factory and therefore does not throw sparks with a ferrocerium rod. I used a flat file on the spine to create a sharp edge, which now throws sparks with a ferrocerium rod perfectly. This is useful for fire preparation as well, as the spine can be used to create fine wood shavings for ignition.

Close-up of the scandi grind

Care must be taken if you decide to choke up the handle near the blade, It's possible to slip and have your index finger slide onto the edge of the blade, causing injury. To help with this issue, I recommend taking a rough sharpening stone and blunting the edge near the corner of the bolster. This will not fully stop injury if your hand slips far, but it will prevent injury if your index finger decides to wander near the edge whilst in use.

 I recommend this knife to those that wish to have a traditional, Nordic knife that is of high quality, whilst being simple to maintain and care for.
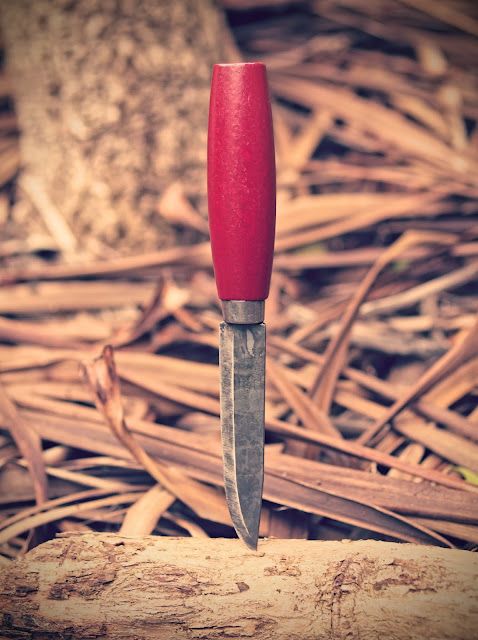
Morakniv Classic No.2


Comments

Popular posts from this blog

A Guide to Making Canvas Wax

  Canvas wax that has been applied, but needs melting in Making your own canvas wax is a great skill to learn. It's also cheaper than buying it from the shops as well. Firstly, you're going to need a few materials: Paraffin wax  Beeswax A mould A tin can A cooking container Leather work gloves Canvas wax fresh from the mould The ratio for creating the wax is 9 parts paraffin wax to 1 part beeswax. For example, if the mould I am using holds 100 grams, I am going to measure out 90 grams of paraffin wax and 10 grams of beeswax. Once you have created your blend of paraffin wax and beeswax, place the mix into the tin can. Once you have completed this step, you can take your cooking container and fill it up with water and place your tin can with the wax mixture inside. Now place the container on a heat source and bring the water to a rolling boil. This technique is called the double boiler and is safe way of melting your wax without setting it on fire. Once the water is at a boil, t...

Chinon Countryman 7x35 Binocular Review

The barrels are covered in a brown leatherette In the modern world, optics are now more affordable than ever before. There are plenty of manufacturers offering good quality binoculars at affordable prices. Of course there are high end brands that still produce the very best optical tools such as Leica, Swarovski and Zeiss. All of the current manufactures of binoculars offer a wide range of optics. When I first got into bushcraft, I wanted to find a binocular that well built, had a wide field of view and was affordable. I opted to buy from the second hand market and came across the Chinon Countryman 7x35 binocular. This particular model of binocular is special as it has a extra wide angle view of 11 degrees.  The objective lenses are coated When buying binoculars of this vintage, it's important to ensure that you purchase from a reputable seller. These Chinon binoculars probably date from the mid 70s. That's a long time of being moved about and the potential for binoculars to ha...

Helikon Bushcraft Satchel Loadout

This pack is a recent addition to my bushcraft gear and a highly anticipated one. I've been after one of these packs for a fair while after seeing countless YouTube videos on them and how well they perform. I decided to pick up the satchel in the coyote colour. There are plenty of reviews on this satchel already on the internet. A quick search on YouTube and you will see plenty of videos. In this blog post, I wont be reviewing the satchel, but I will be going over what I have decided to carry in it and the context behind the selected items.  Helikon bushcraft satchel The bushcraft satchel has a large 17 litre capacity. I won't be using the full capacity of the satchel, this would get too heavy. My aim is to keep the satchel nice and light with room to add additional items as and when needed. Another good reason for doing this is that I then have additional room for foraged edibles. I'd like the satchel to contain the five Cs of survival: cutting tools, combustion, cordage, ...